By default, VirtualBox creates dynamic disks that grow over time as you add data. However, if you delete data from the virtual machine later, you’ll notice that the disk doesn’t automatically shrink. But you can manually shrink a dynamic disk using a hidden command.
Remember that this will only shrink the disk if it’s grown in size and you’ve since removed data. So, if you just created a dynamic disk, this won’t shrink it. But, if you’ve created a dynamic disk, downloaded 10 GB of data into it, and then deleted that 10 GB of data afterwards, you should be able to shrink the disk by about 10 GB.
Step One: Ensure You’re Using a Dynamic Disk
This process only works for dynamic disks, which can grow and shrink in size. Dynamic disks may be up to a certain maximum size—50 GB, for example—but they only actually grow to that maximum size when they contain that much data. Fixed size disks will always be their maximum size.
If you have a fixed size disk you want to shrink, you can first convert it to a dynamic disk and then follow the below instructions. For example, if you have a fixed disk of 50 GB in size with only 20 GB of data on it and you convert it to a dynamic disk, you should be able to shrink it to take up only 20 GB of space.
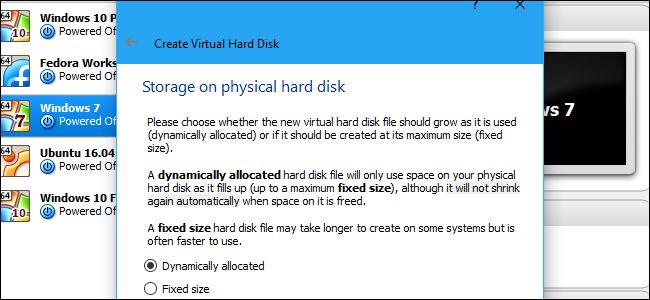
To check whether a disk is dynamic or fixed size in VirtualBox, right-click the virtual machine that uses the disk and select “Settings”. Click the “Storage” tab and select the disk. You’ll see what type of disk it is displayed next to “Details”.
For example, in the screenshot below, “Dynamically allocated storage” indicates that this is a dynamic disk.Step Two: Write Zeros to the Disk in The Virtual Machine
Be sure to delete any data you no longer want on the disk inside the virtual machine to free up space before continuing. Delete files you don’t need, uninstall programs you no longer use, and empty your Recycle Bin. Then, you’ll need to overwrite that empty space with zeroes.
For Windows Guest Operating Systems
If you have Windows installed inside the virtual machine, you should now boot the virtual machine up and defragment its disks. Inside the virtual machine, search the Start menu for “Defragment” and launch the “Disk Defragmenter” or “Defragment and Optimize Drives” tool. Select the disk you want to compact and click “Defragment disk”.
After the defragmentation process is finished, you will need to write zeros to the empty space inside the virtual machine. When you delete files, the deleted data is still stored on the disk so VirtualBox can’t automatically shrink the drive. But, when you write zeros over the deleted files, VirtualBox will see a large amount of zeroes—empty space, in other words—and be able to compact the disk.
To do this, download the SDelete utility from Microsoft. Extract the sdelete.exe file to a folder on your computer.
Open a Command Prompt window. To do so, open the Start menu, search for “Command Prompt”, and launch the shortcut.
Change to the directory containing the sdelete.exe file by typing cd , pressing Space, entering the path to the directory, and pressing Enter. Be sure to enclose the path in quotation marks if it contains a space character. It should look like this:
cd "C:\path\to\folder"
For example, if you extracted the sdelete.exe file to your user account’s download folder and your Windows username is Bob, you’d run the following command:
cd "C:\Users\bob\Downloads"
To quickly fill in the directory path, simply type cd into the Command Prompt window, press Space, and then drag and drop the folder icon from the file manager’s address bar.
Run the following command:
sdelete.exe c: -z
This will write zeros to all the free disk space on drive C:. If you want to shrink a secondary drive located at a different drive letter in the virtual machine, type its drive letter instead of c:. This is what the tool was designed for. As the SDelete page on Microsoft’s website notes, the -z option is…
The post How to Shrink a VirtualBox Virtual Machine and Free Up Disk Space appeared first on FeedBox.