Author: Donald Papp / Source: Hackaday
Smoothing the layer lines out of filament-based 3D prints is a common desire, and there are various methods for doing it. Besides good old sanding, another method is to apply a liquid coating of some kind that fills in irregularities and creates a smooth surface.
There’s even a product specifically for this purpose: XTC-3D by Smooth-on. However, I happened to have access to the syrup-thick UV resin from an SLA printer and it occurred to me to see whether I could smooth a 3D print by brushing the resin on, then curing it. I didn’t see any reason it shouldn’t work, and it might even bring its own advantages. Filament printers and resin-based printers don’t normally have anything to do with one another, but since I had access to both I decided to cross the streams a little.The UV-curable resin I tested is Clear Standard resin from a Formlabs printer. Other UV resins should work similarly from what I understand, but I haven’t tested them.
Current Smoothing Methods
There are several ways to smooth prints, including:
- Sanding, usually along with using fillers like Bondo
- Smoothing with solvents (e.g. acetone vapor bath for ABS)
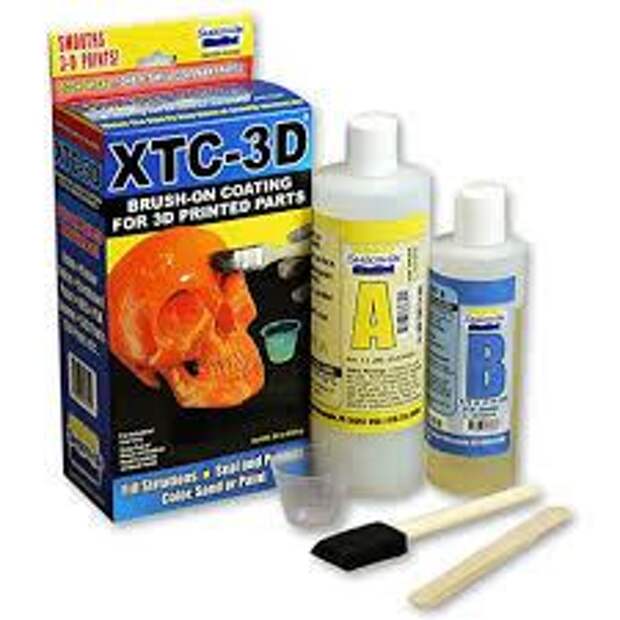
- XTC-3D (a gap-filling liquid conformal coating that hardens)
- Spraying with filler primer (not very good for smoothing layer lines, but included regardless.)
Each of these methods is very different. Sanding, usually in combination with gap filling materials like Bondo, is easy to do, offers the most control, and gives reliable results.
The downsides are that it is time-consuming and messy.Smoothing ABS prints with acetone vapors can look amazing but results depend heavily on applying the process just right, and mistakes generally cannot be salvaged. Also, open flame and acetone do not mix (or rather they mix too easily, and undesirably.)
XTC-3D is a thin, two-part liquid that is mixed and then painted onto a model in a thin coat. According to the manufacturer, working time for a batch is about 10 minutes and cure time is four hours. Results are supposed to be very good if one has the time and patience to mix and apply multiple coats.
Spraying with filler primer is, in my experience, suitable for smoothing out scratches and other minor surface imperfections only. I’ve never observed it to have any real effect on removing something like layer lines.
Why Bother with UV Resin?
On the surface, using UV resin doesn’t seem to offer much over XTC-3D. They are both specialty products, both require special handling and application, and both will smooth 3D prints by applying one or more thin layers of goop that hardens. But for those people who may already have access to UV resin, it does offer several potential benefits:
- No mixing required. The UV resin can be used as-is.
- Less wasteful; use only what is needed. (With XTC-3D the unused portion of a batch is garbage, as well as the receptacle and brush.)
- Indefinite working time. The resin cures when exposed to UV but premature curing isn’t a worry under something like normal workbench lighting.
- Viscosity can be changed by thinning the resin with isopropyl alcohol.
- If one has access to SLA or DLP printers, there’s no need to buy a separate product. Just use the dregs from old containers or build platforms, or skim some from a fresh supply. A little goes a long way.
Of course, none of this matters much unless UV resin can actually smooth 3D prints in an effective and reliable way. I did some work to find out how well it performs, what affects the results, and what other practical issues are involved.
Working with UV Resin

Wear gloves, make sure you protect your work surface from spills, and avoid any potential contamination of resin intended for working printers. If you take some resin to use for 3D print smoothing, do not return it to a printer’s reservoir or container.
Uncured resin can be cleaned up with isopropyl alcohol; it can also be used to dilute the syrupy resin prior to application. I tested a few different ratios of resin to alcohol to measure the results. In short, just as with paint, it’s possible to thin it out too much to be useful. Application of the resin was with cheap and unremarkable bristle brushes.
Curing the resin is by UV, ideally 405 nm in the case of the Formlabs resin I used. I have a UV cure box I constructed, but I found that it was easiest to simply place the coated object in direct outdoor sunlight. Most windows will block UV, so outdoors was best.
The Test Objects and Mixtures
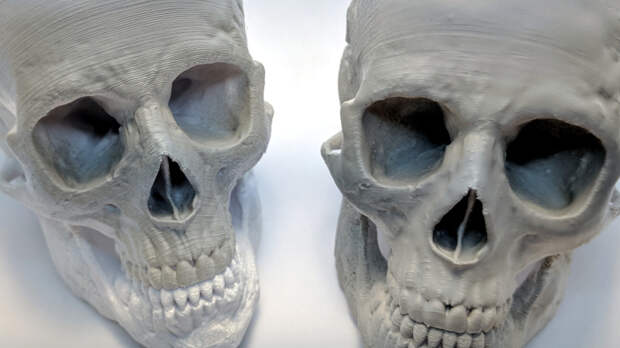
Three identical bone-shaped scrap prints were selected as test objects. They were all printed with a 0.8 mm nozzle and a 0.30 mm layer height. They look something like a topological map, so they were excellent test pieces. In addition, two small skulls were used. The skull model is by Makerbot, downloaded from Thingiverse.
I used three different mixtures:
- 100% UV resin, straight from the container. It has a corn syrup-like viscosity.
- 50% – 50% mixture (by volume) of UV resin to isopropyl alcohol. Viscosity resembles maple syrup.
- 25% –…
The post 3D Printering: Print Smoothing Tests with UV Resin appeared first on FeedBox.