Author: Michael Crider / Source: reviewgeek.com
If you’re ready to wade out of the shallow end of the mechanical keyboard pool, then it’s time to start building your own. Here’s everything you need to build your first one from scratch.
Why build your own? For the same reason people invest lots of time, energy, and sweat into working on a custom car—because you want what you want, the way you want it, and the only way to achieve that is by doing it yourself.
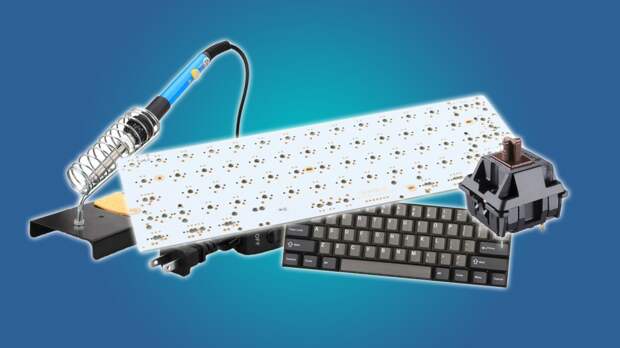
By learning how to craft your own keyboard you can get exactly what you want: the exact layout, the exact switches, the exact LEDs (or lack thereof) and even the exact casing for the body of the keyboard itself.There are a lot of parts in this list, but trust me, it’s not as complex as it seems. Essentially you grab a PCB (printed circuit board), solder the switches into the pre-set spots, then put the keycaps and the case in place, and you’re done.
Learning how to effectively use the soldering iron will be the most difficult bit for novices, and we’ve accounted for that, with a nice all-in-one beginner’s kit and an electronics toy you can practice on before you get to the real thing. It’s worth noting at this point that a soldering iron is, well, an iron, and it needs to be a couple of hundred degrees in order to melt the solder. So this isn’t for kids, unless they’re approaching adolescence and you’re willing to supervise them pretty closely.
Mechanical Keyboard PCB: GH60 “Satan” ($30)

Don’t let the odd name fool you. This printed circuit board is the standard beginner’s model, allowing the user to assemble a small 60% board quickly and easily. Once you have everything assembled it doesn’t need any extra programming—just plug it into your computer with a MiniUSB cable (you’ll need one of these if you don’t already have one laying around) and you’re ready to go.
But the 60% layout does take some getting used to, and if you’d like to customize it for easier access to the arrow or function keys, this PCB is compatible with the popular web-based TMK programming tool. All you need to use that is a browser. For your first build, we recommend going without LEDs.Mechanical Keyboard Case: KBDFans GH60 ($22)

This is the case that your fully-assembled keyboard will rest in. It’s not especially fancy, just some standoffs and screws and an access hole for the USB port, but it’s inexpensive and specifically compatible with the GH60 PCB. All you need to do is screw down the board and plug it in. Later you can upgrade your custom keyboard with a fancier model made from aluminum or wood, without needing to build a completely new board, thanks to the standardized five-standoff design. I can personally recommend KBDfans as a reliable supplier for this hobby.
Mechanical Keyboard Switches: Cherry MX PCB Mounted ($45 for 70)
The post Everything You Need To Start Building Mechanical Keyboards appeared first on FeedBox.