Author: Michael Crider / Source: howtogeek.com

Properly formatting bibliographies has always driven students crazy. With modern versions of Microsoft Word, though, the process is streamlined to the point of almost being automatic, and today we’re going to show you how to add citations and bibliographies to your Word documents.
Note: the techniques we’re going to cover here should work for Microsoft Word 2007 and later. The screenshots are all taken in the latest version of Word 2016, so your version might look slightly different, but it works the same way.
Creating Sources and Adding Citations To Your Text
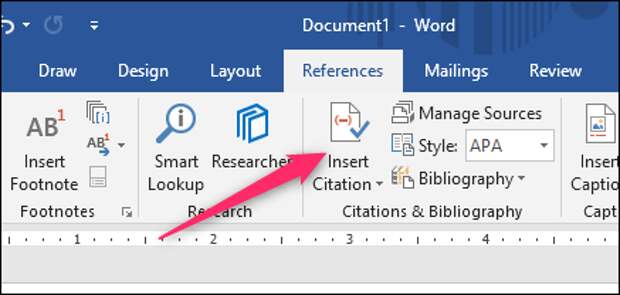
When you’re working on any Word document, place your cursor where you want the citation to be placed. Switch to the “References” tab on the Ribbon, and then click the “Insert Citation” button.
The popup menu that appears shows any sources you have already added (we’ll get to that in a moment), but to add a new source, just click the “Add New Source” command.

In the Create Source window that appears, you can enter all of the relevant information for just about any source. The default setting for the “Type of Source” dropdown is Book, but just open that dropdown to choose other types of sources like journal articles, web sites, interviews, and so on. So, pick the type of source, fill out the fields, give your source a tag name (typically a shortened version of the title), and then click “OK” to finish the source.
Note: By default, Word uses APA citation style, but it’s not limited to that. If you’re using another citation method for your document, click the “Show All Bibliography fields” option to fill out extra information.
Word adds a citation for your new…
The post How To Automatically Add Citations And Bibliographies To Microsoft Word appeared first on FeedBox.