Your Chromebook automatically connects to Wi-Fi networks you’ve previously connected to. But, if multiple known Wi-Fi networks are in range, you might want to configure which one gets priority. For example, you can prioritize your home network over your neighbor’s network, which is nearby but faint.
This feature is also available on Windows 7, Windows 8 and 10, and macOS.
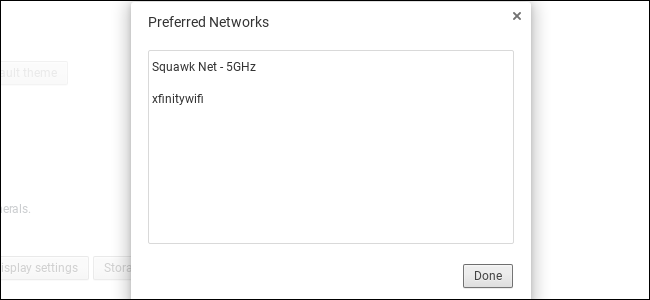
How to Set a Preferred Network
First, open your Chromebook’s settings screen. Either click the tray at the bottom right corner of your screen and click the gear-shaped “Settings” button or click menu > Settings in a browser window.
Ensure you’re connected to a Wi-Fi network you want to prefer—for example, your home or workplace network.
Click the “Wi-Fi network” option here to open the list…
The post How to Prioritize Your Preferred Wi-Fi Networks on a Chromebook appeared first on FeedBox.