Author: Tom Nardi / Source: Hackaday
You’ve written your firmware code, etched your own PCB, and now it’s time to put that awesome new project of yours into an enclosure. Unfortunately, all you have is a generic Radio Shack project box that you picked up when they were clearing out their inventory.
If you put your project in that, it’ll have all the style and grace of a kid wearing hand-me-down clothes. Your project deserves a tailor-made enclosure, but the prices and lead time on custom plastic enclosures are prohibitive for one-off projects.In Ye Olde Olden Days, the next step might have been to start bending some sheet metal. But it’s the 21st century, and we’ve got mechanization on our side. The “Ultimate Box Maker” by [Heartman] is a fully parametric OpenSCAD design which allows you to generate professional looking enclosures by simply providing your desired dimensions and selecting from a few optional features. In a couple of hours, you’ll have a custom one-of-a-kind enclosure for your project for a few cents worth of filament.
That’s the idea, at least. For this edition of “Printed It”, I’ll be taking a look at the “Ultimate Box Maker” by generating and printing a basic enclosure. As somebody whose Radio Shack was out of enclosures by the time I got there and who doesn’t want to slice his hand open folding sheet metal, I’m very interested in seeing how well this design works.
Configuration
So in theory, this design is supposed to work with the Thingiverse Customizer, which is basically just a web front-end for OpenSCAD.
You get nice little sliders and dialog boxes, and once you have all your information entered, it will render you a custom STL to download. It’s arguably one of the best ideas MakerBot has come up with in regards to how Thingiverse works. Unfortunately, at the time of this writing, Customizer doesn’t seem to work anymore and just gives an error about missinglibCGAL.so.10. Sigh. 
In that case, we’ll need to download the .scad file from the “Thing Files” tab and open it up in OpenSCAD locally. All the configuration values are up at the top of the file and clearly labeled, which makes this fairly easy.
Obviously, you’re going to want to adjust the overall box dimension variables at the minimum. But there are also a whole set of options for PCB standoffs (position, diameter, screw size, etc), as well as options related to the built-in vents.
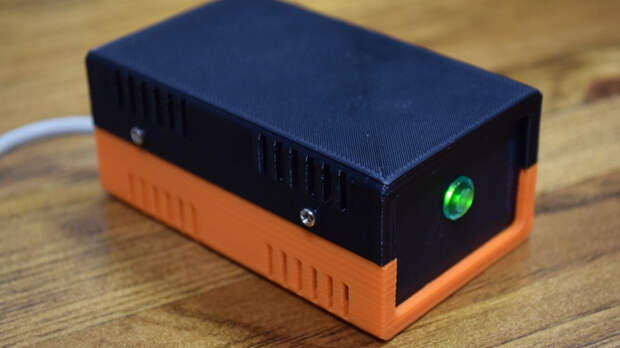
Making use of the OpenSCAD import(); function, you can bring in an STL of an existing PCB and see exactly how it will look in the rendered case. As a demonstration, I’ll be making a small enclosure for the Pi Zero, so I’ve imported an STL of it and used that to align the PCB standoffs. But even if you don’t import an STL to use as a guide,…
The post Printed It: Custom Enclosure Generator appeared first on FeedBox.