Author: Alex Glow / Source: Make: DIY Projects and Ideas for Makers

Meet my familiar, Archimedes! He’s a robotic owl who sits on my shoulder and detects the emotions of people around me. Then he gives feedback via colored lights and little beep-boops. He can move and look around, too — thanks to a pan/tilt servo gimbal with an Arduino controlling the motors.
THE BRAIN
The first part of the build is assembling the Google AIY Vision kit. This “DIY AI” introductory kit forms Archimedes’ brain and sensory system: a Raspberry Pi Zero W with “bonnet” add-on, camera, piezo speaker, and multicolor light-up button. Its fold-together cardboard enclosure is really fun to assemble.
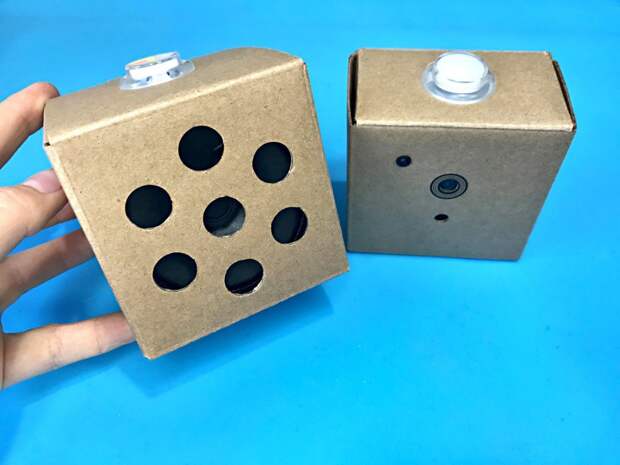
Just follow Google’s official instructions to put the kit together, and test the setup to make sure it works. You should be able to run the default Joy Detector demo without any extra coding, but of course, you can tweak it if you want — it’s written in Python. The Joy Detector uses machine learning to detect if a person is smiling (the button turns yellow) or frowning (the button turns blue). For really big expressions, the buzzer will sound too. If the camera sees more than one face, it adds up their joy scores.
TIP: Make sure you install the plastic standoffs to protect the Pi and bonnet from mechanical stress. Mine broke when I took the kit apart later, so maybe get extra standoffs.
BODY MOVEMENTS
Two servomotors allow Archimedes to tilt his body up and down and rotate his head side to side. I started with a pan/tilt mechanism from HackerBoxes’ “Vision Quest” kit (hackerboxes.
com/products/hackerbox-0024-vision-quest) but you can use any pan/tilt gimbal setup; there are 3D-printed parts available on Thingiverse, if you already have a couple of servos lying around. Make sure the “tilt” part is on the bottom and the “pan” on top — since owls don’t usually pivot on their legs.Do a quick calibration on your servos and check their tolerances. What’s the furthest they can go in either direction? (If they start humming or buzzing, they’re pushed too far.) Edit the Arduino sketch to match that; you can download the code. Right now the Arduino just moves the servos randomly so Archimedes can look around for faces. But you can modify the code for different behavior or, even better, figure out how to make the Raspberry Pi do it!
I do recommend servos with metal gears; they’re a bit heavy, but they can definitely handle controlling a robot like this. If you’re using 3D-printed mounts instead of metal mounts, you might be able to get away with plastic-gear servos. Plus, the whole robot would be a bit lighter, which might be nice.
The two servos are connected to the Arduino.

Take the time to solder everything together, and once everything’s working, you can cover it in hot glue to insulate and stabilize the connections.

I used a small protoboard from another project to make the branching connections, to ensure that nothing would short out.
3D PRINTING
I used Onshape, a browser-based CAD modeling tool, to design Archimedes’ 3D-printed body parts. He comes in five pieces: the head, top hat, left and right wings, and front feather accent.


The STL files are available from my write-up on Hackster. You can also use a service like 3D Hubs or Shapeways if you don’t have your own 3D printer.
Want to mod the design? Please do! The main considerations are:
- The “brain” electronics must fit inside the head (the cables are long, but not long enough to reach down below the servo gimbal).
- Make sure you can easily accommodate the piezo buzzer…
The post Google AIY Robot Companion appeared first on FeedBox.